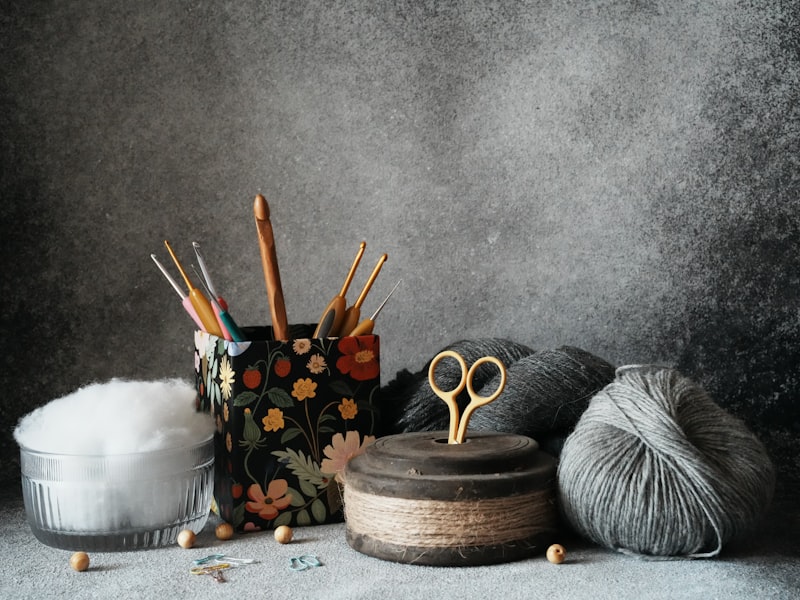
Tools and supplies for Crocheting
First and foremost, you will need a hook and some yarn. As a beginner, choosing your hook and yarn depends on the first project you would like to start out with. I have more on choosing these first tools in the “Choosing Your Project” section below.
Crochet Hooks
Hooks are measured in millimeters or a US letter/number system. I prefer the metric system when choosing my hooks because the US number system tends to vary in size between brands.
When determining which hook size to use, consider the following:
- The yarn weight and type
- The tension in your technique
- The desired look you wish to have for your project.
An example might be: you are creating a shawl versus a toy with the same yarn, the shawl can be airy and light, meaning you use a bigger hook, while with the toy, you want your final product to be tight with no holes so the stuffing doesn’t fall out so you use a smaller hook.
Tip: Cheap hooks can be found at Walmart for $2-3 per hook. I recommend grabbing one or two of these to start out in order to get a feel for the hobby without breaking the bank.
There are many other factors to consider when choosing a hook such as:
- the material the hook is made with (metal, plastic, wood, ect.)
- the handle shape or grip
- Comfort accessories
Many people begin to have issues such as hand fatigue whilst crocheting that they try to combat by using solutions such as makeup sponges skewered through the hook for a more comfortable grip. You can read about these different hooks and how to determine what type of hook would be best for you, or which ones you may be more inclined to dabble with here.
Other Helpful Tools
- Yarn needle or tapestry needle. This is just a big sewing needle with a large eye for the yarn to go through. It is good for weaving in ends and sewing amigurumi projects together.
- Polyfil is a good thing to have if you desire to create anything with stuffing such as home decor or amigurumi.
- Safety eyes, and hot glue gun, can also be used for amigurumi projects.
- Stitch Markers, scissors, and measuring tape. These are good to have for accuracy and consistency.
Choosing Your Yarn
So many things go into choosing a yarn. Depending on your project, you need to consider:
- the type of project
- the feel and look you are trying to achieve
- Care instructions (some yarns are machine washable, others are not)
Types of Yarn
There are so many different types of yarn. Each type has its own positives and negatives.Let’s start with the most common two:
- Acrylic: Many people claim that acrylic yarn isn’t good to use because it’s basically made from plastic, but it is very durable, machine washable, soft (some brands may be more stiff) and easy to work with, not to mention, cheap. This is a great beginners yarn to work with.
- Cotton: my personal favorite. While some brands can be coarse and dense, some brands are super soft. It is fairly easy to work with, but also easy to split the strands apart.
The only way you will know what yarn type you prefer will be through experimenting with the different yarns. You will want to read the care instructions carefully on all yarns to ensure the quality of your product as time goes on.
Some other types of yarn include:
- Wool
- Alpaca
- Chenille
- Blanket
- T-shirt
You can read more about these types, and their pros and cons Here
Choosing Your First Project
When I first started, I had no idea what I was doing. I had bought a small kit that came with 5 hooks and a few patterns (cat bed, small dog sweater, cat toy, etc.). I still haven’t made any of those!
My husband at the time suggested I make a potholder first – a beginner friendly project. So we bought a roll of Peaches and cream 100% cotton yarn. This yarn is:
- Machine washable, but tumble dry with no heat
- Worsted weigh #4 yarn
- They recommend using a 4.5mm or 5mm hook
Which is exactly what I used when making my potholders. I looked up a youtube video of a potholder I thought was cute, when I tried to execute it, it didn’t turn out well. So I frogged it and tried a different pattern on youtube for my second attempt. My first few took me what forever to complete – now one potholder takes me about an hour to complete.
I would suggest making these potholders first in order to get familiar with where stitches go and how to execute a simple stitch, as well as maintaining tension. These are hard to mess up.
I would not recommend starting with square blanket projects because people often struggle with:
- Uneven edges
- Lost or extra stitches
- Frustration over slow progress

If you want to do a blanket, start with simple stitches and count often. To avoid an issue like the picture above.
My Second Project: A Sunflower Blanket
My second project was a blanket. Except I didn’t make a simple single stitch square blanket like most newbies would do. I made a circle double crochet design, creating a sunflower bouquet blanket. This taught me:
- how to make a magic ring and a flat circle
- the importance of counting my stitches: it is easy to add an extra stitch in the same stitch if you are not paying attention
- New stitches like the half double crochet (HDC), double crochet (DC) and a treble crochet (TC) while making this blanket.
- How to read a basic written pattern
The blanket took me over a month but after these two projects, I felt like I could crochet almost anything.
Good Next Projects for Beginners
From here, easy small projects like turtles or keychains that work up quickly are a good way to learn amigurumi. You can find simple patterns like this on youtube as well for free. Etsy is a really good place for purchasing patterns. They don’t usually cost too much and a lot of time you can find them on sale or add them to your favorites list and get coupons emailed to you by the pattern’s owner.
You can make all sorts of things based on your interests such as:
- Amigrumi: Stuffed toys, animals, dolls
- Clothing: hats, scarves, cardigans, pants, baby clothes, etc.
- Home decor: baskets, wall hangings, blankets, pillows
- Seasonal Crafts: Pumpkins, Christmas ornaments, heart garlands
- Novelty gifts: keychains, bookmarks, florals, plushies
The possibilities are truly endless.
Final Thoughts
Once you gain the basics, the rest really opens up and flows. Start small, give yourself room to make mistakes, frog and try again. My first amigurumi, I tried to make a dinosaur… he didn’t turn out great, but my kids love him and gave him the name “puppy”. That is what truly matters in the end.
You’ve got this – one stitch at a time.
Comments
One response
Hi, this is a comment.
To get started with moderating, editing, and deleting comments, please visit the Comments screen in the dashboard.
Commenter avatars come from Gravatar.